
Looking to build your first website but don’t have the time to learn how to make one?
In this article, I’m going to show you how to create your own website in just 10 minutes. A website that’s sure to impress.
I’m giving you straightforward, easy-to-follow tips so you can create a website that will deliver everything you need it to.
I cover the whole process, from choosing a web host to changing settings in your contact form.
If we told you this entire process will run for about 10 minutes only, more or less, would you believe us?
Imagine that. In just 10 minutes, you will build your own WordPress website that will wow your audience!
How to Make a Website – The Simple 8 Step Process
I’m going to share the basics in the following steps:
- Step 1 – Get hosting services from our friends at SiteGround
- Step 2 – Install and set up WordPress
- Step 3 – Add an SSL certificate
- Step 4 – Log into Your WordPress website
- Step 5 – Install a WordPress theme
- Step 6 – Pick the starter site to import
- Step 7 – Use the customizer and Elementor
- Step 8 – Set up an email for the contact form
My goal in this article is to have you design your website, giving you all the control over each aspect.
OK, so let’s get started!
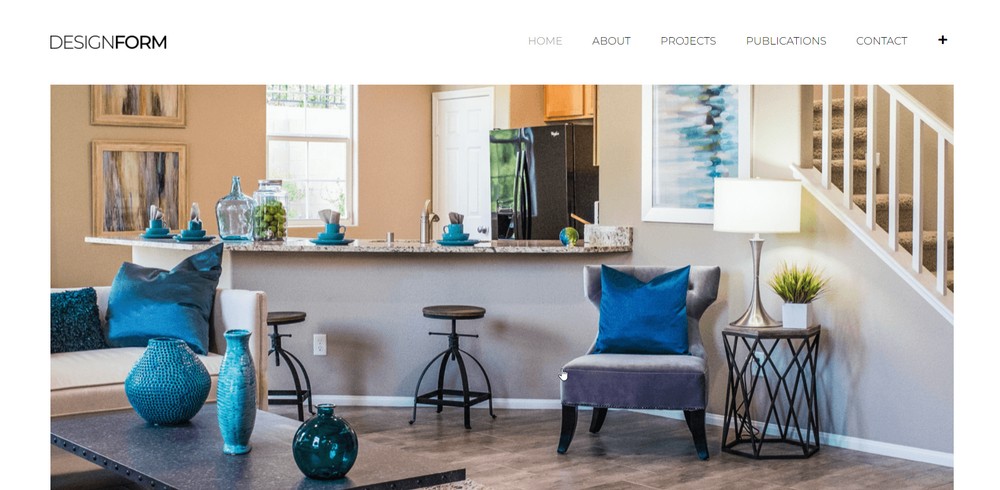
First, take a look at this website. It’s impressively done, don’t you think?
Check out the overall appearance of the page. The aesthetic is perfect for any type of business or professional website.
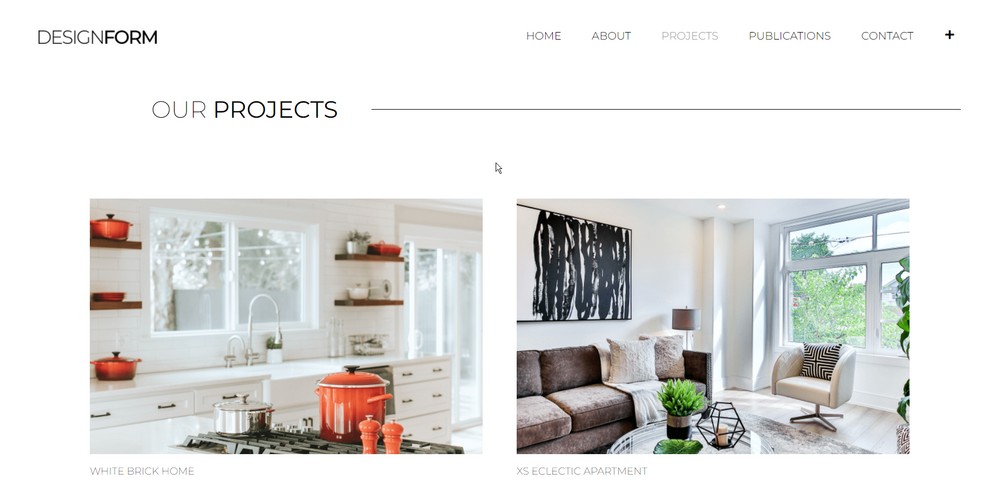
This is the portfolio page, which is optional. Here you can display images or any content for business or professional projects done in the past.
This is the About page. Notice the big “hero” image.
If you can put a photo of your team right there, that would be cool. Perhaps a shot with the office or company logo behind the people?

And still on the About page, here’s where we usually put the people on your team. It talks about the individual members of the company.

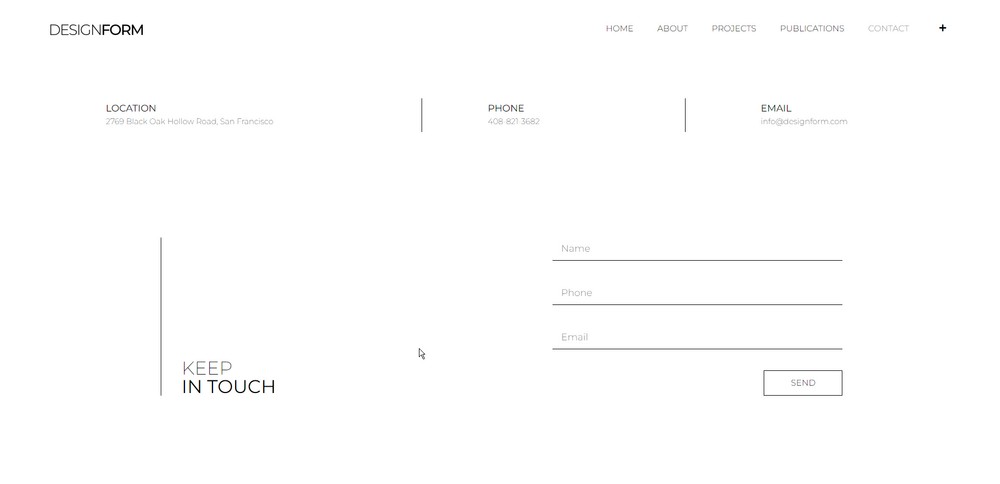
Then it’s the Contact page. It’s where your audience learns about your contact information.
You’re going to need to put your address, contact number and email here and perhaps your social media links too.
You might also want to add a map and driving directions on your Contact page. It’s entirely up to you.

Still, in the Contact page, there’s a form to fill out should your customers want to get in touch with you.
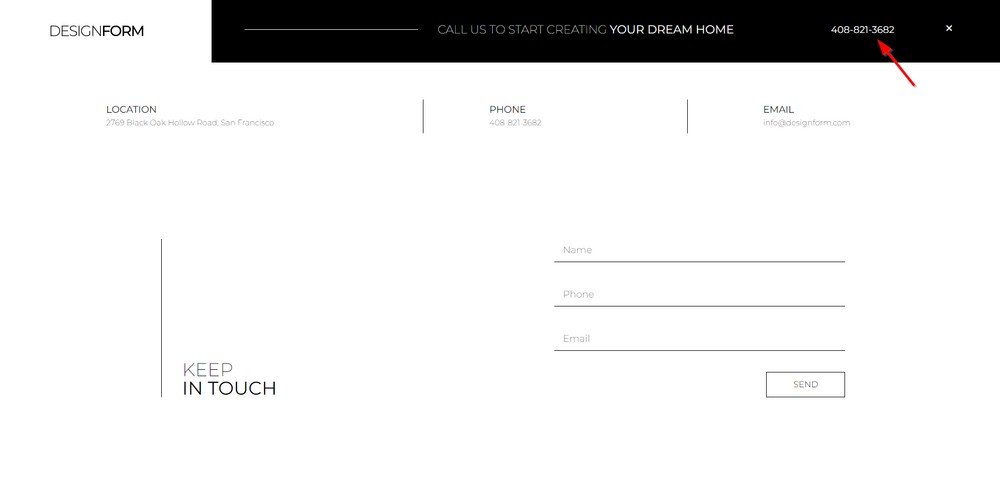
In the navigation area, shown on the top right part of the screen here, you may also want to display your phone number.
This allows people to easily see and hopefully, it when they’re visiting your website.
Now here’s the great news. All this can be easily done and edited in less time than you might think.
You just go to the editor, highlight the text you want to change, and it’s done!
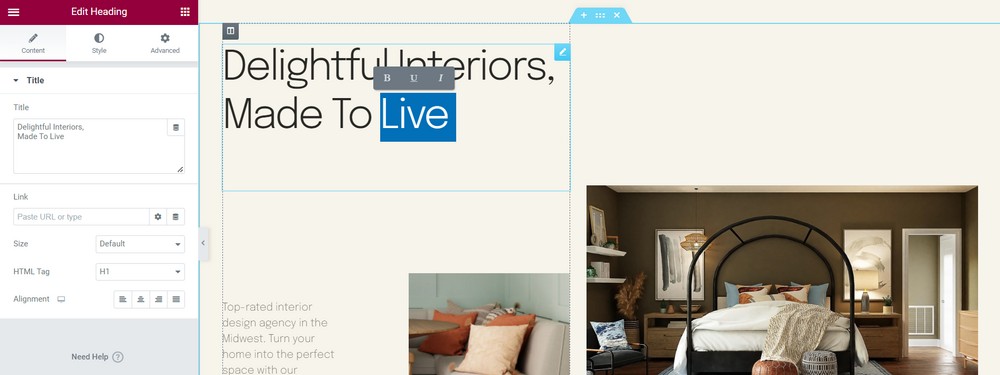
Same goes with your images. Just click on the image to change it.
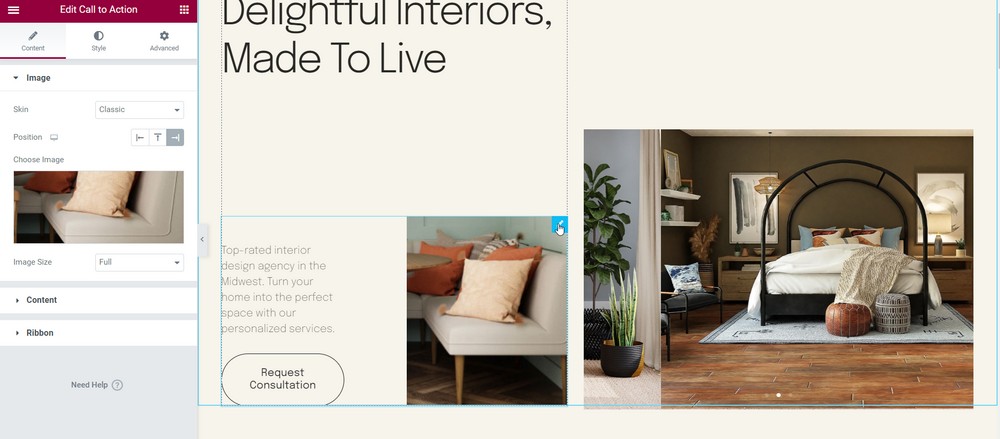
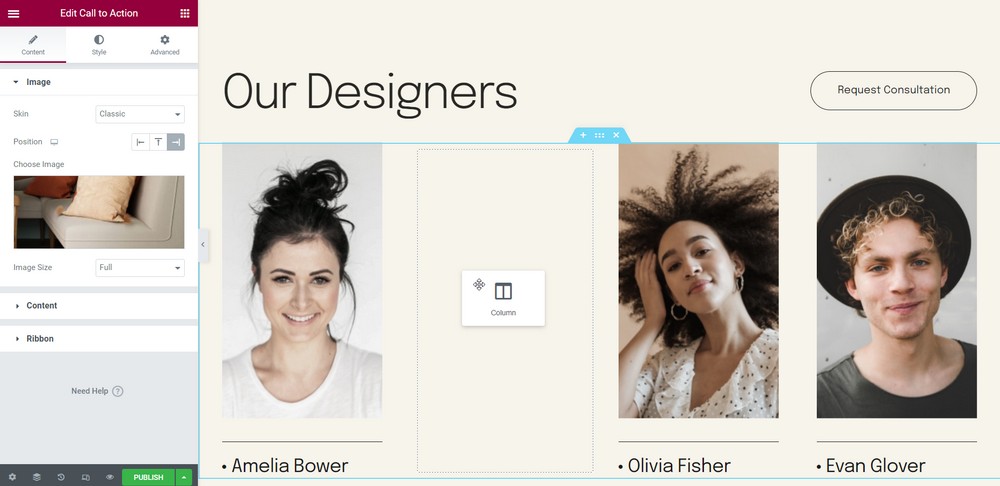
You can also rearrange items. Just drag and drop it to where you want it.
Now let’s get on with our tutorial.
If you want to build your first website, you’ll need a hosting account.
Step 1 – Get the Right Hosting
The first thing you’ll need for your website is a hosting account. A hosting is sort of like a space that you rent out on the internet.
Go to WPCrafter and choose a web hosting company. We’ll go with the Non-Techie option in this list.

For this tutorial, we’ll use SiteGround Web Hosting. Go to their page and select Web Hosting.
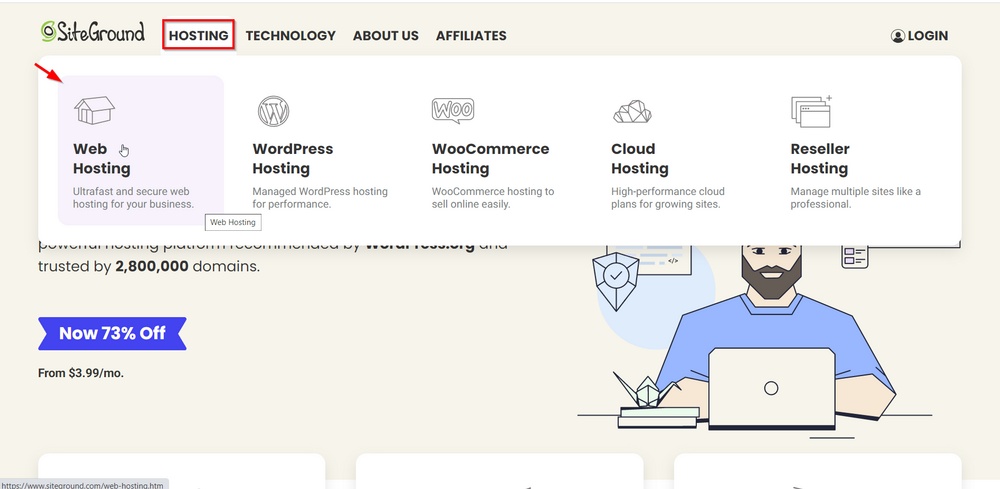
You’ll have 3 plans to choose from. We typically go for the middle one because it includes unlimited websites.

You’ll be led to another page where you’ll need to enter your domain name.
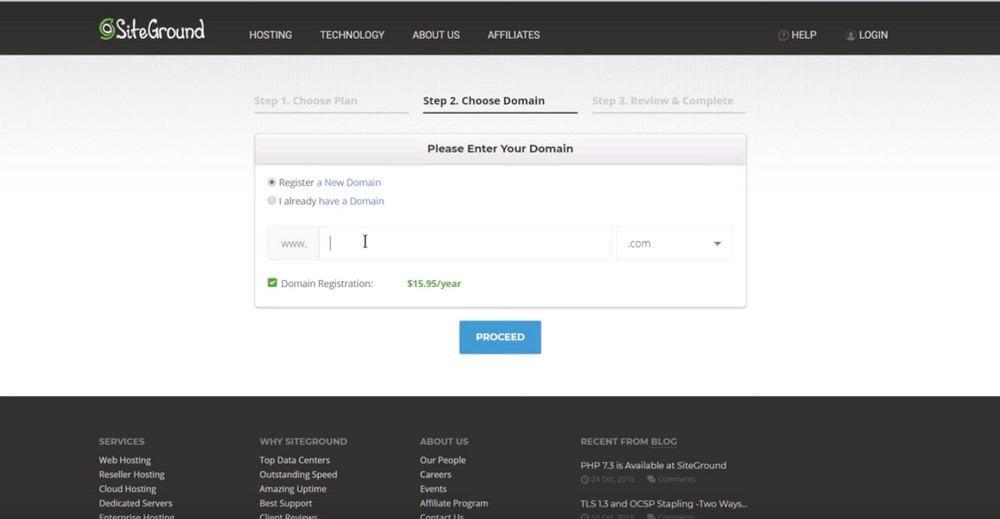
SiteGround will then check if your picked domain name is available.
If it’s available, the next page you’ll see will have “Congratulations” in it.
Now just proceed with filling out the required information.
Step 2 – Install WordPress
After creating your SiteGround hosting account, you’ll be given an option to set up your WordPress website.
You can start a new one or transfer an old website. Or you can skip the process if you don’t want to do that at the moment.
Here’s where you begin setting up your WordPress website. Fill out the necessary fields.
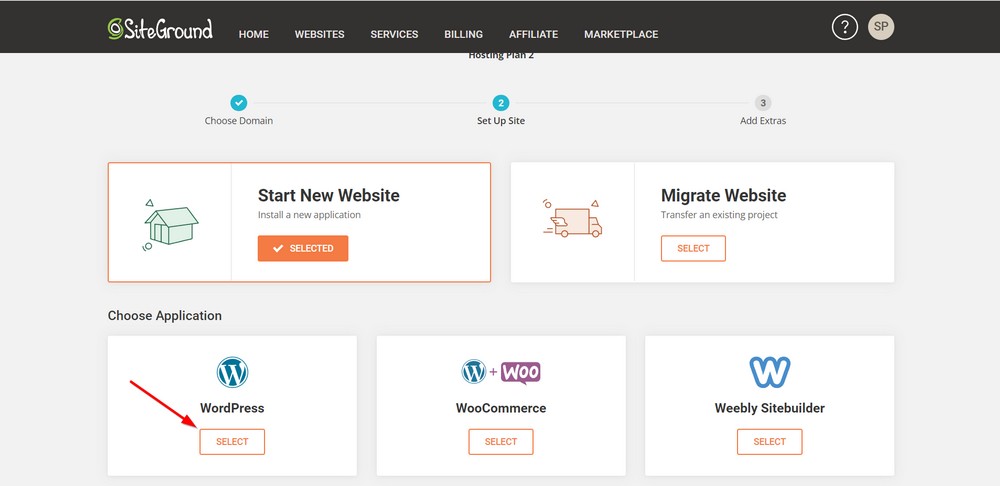
Step 3 – Installing an SSL Certificate
The security certificate is already included in your SiteGround hosting account.
To install, just click “Websites” and then click “Site Tools”.
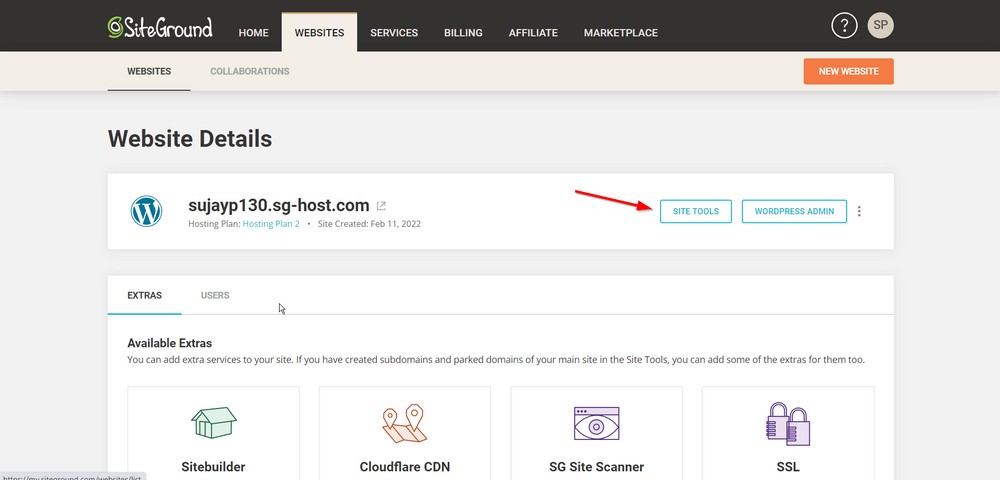
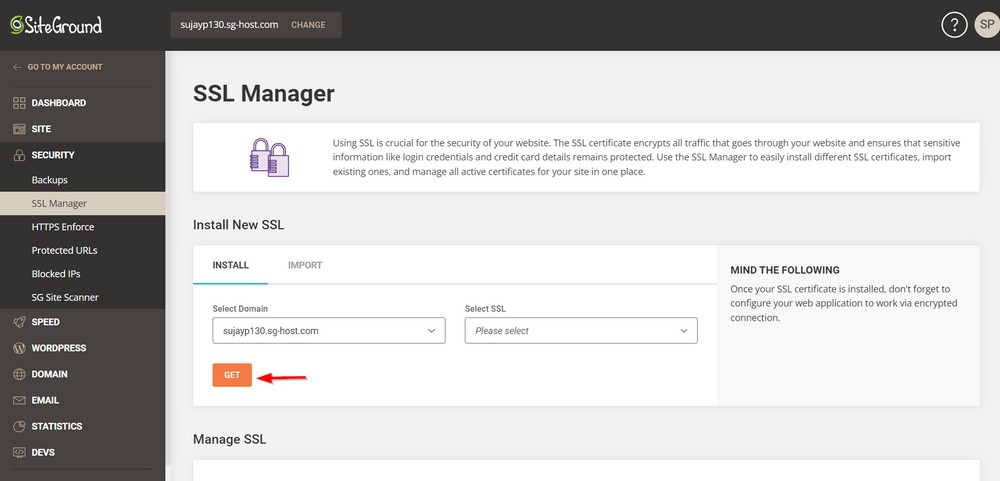
Next, go to Security > SSL Manager
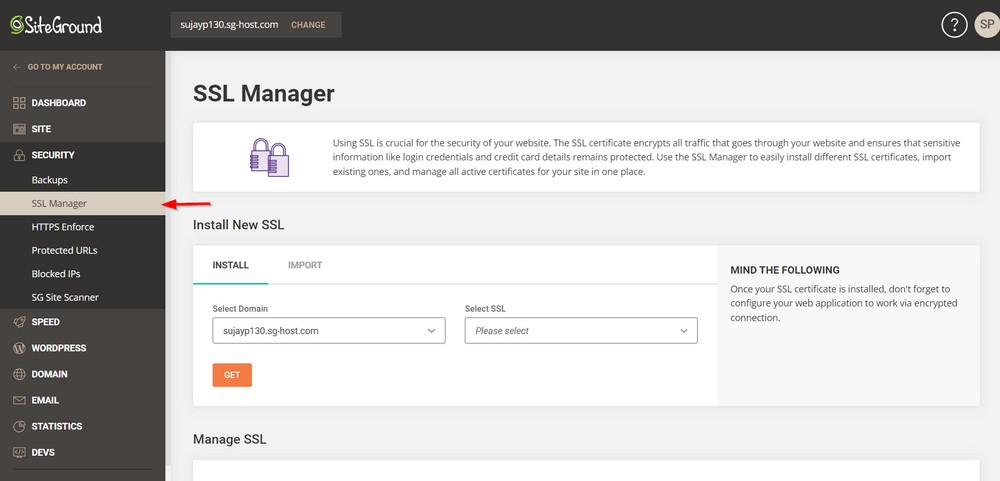
Now select the domain where you wish to install the SSL certificate and click Get.
Step 4 – Log Into Your WordPress Website
Now let’s go back to My Accounts and click on “Go to Admin Panel.”
This will open up your website login form. Use the login information you created to access your WordPress website.
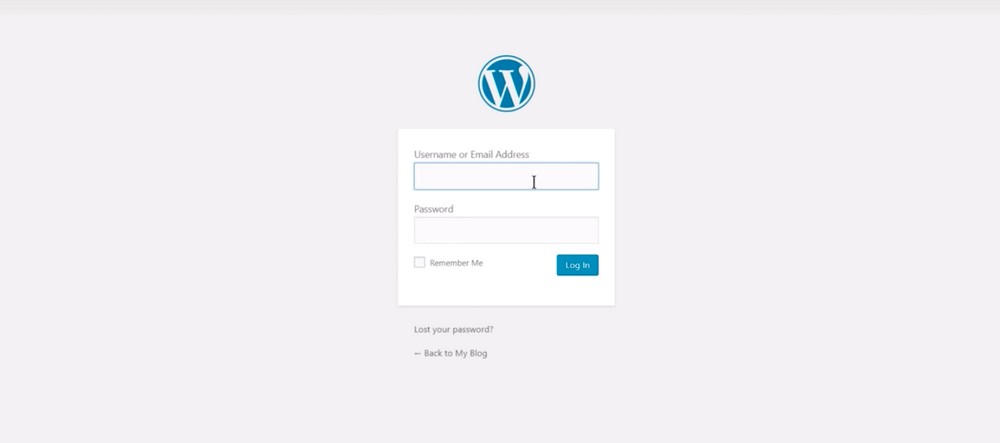
Once you’ve logged in, your WordPress website is officially live.
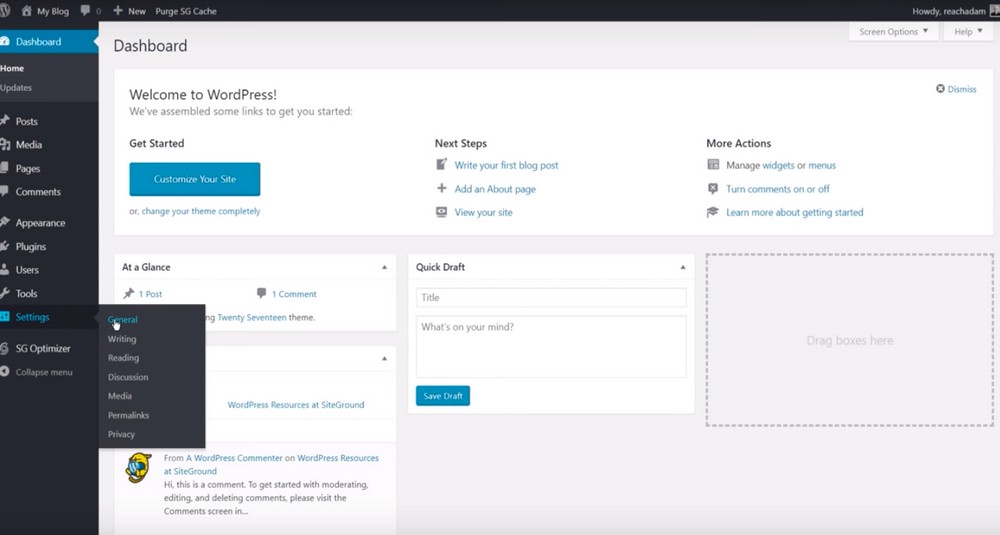
To use that security certificate you installed, go to Settings > General.
Look at your URL at the WordPress Address and Site Address fields. This one’s just a slight modification.
Simply slip an S so it will say HTTPS. Do that in the 2 fields: WordPress Address (URL) and Site Address (URL).
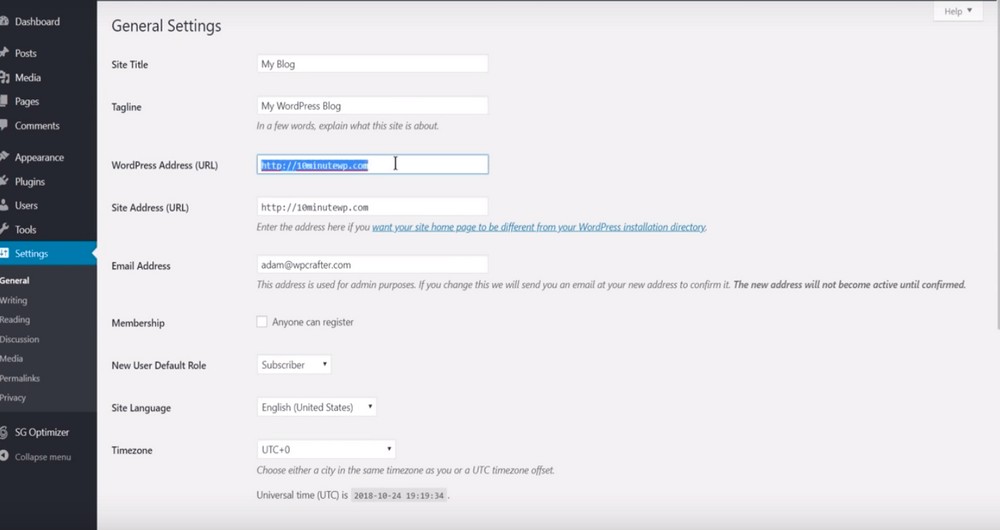
Save the changes and you’re good.
WordPress will prompt you to log in again.
But notice a slight change here. Your URL has an HTTPS now. Google kinda requires it nowadays.
So what does that mean?
All traffic to your website will be encrypted. It’s also going to help with your website’s SEO.
Step 5 – Install a WordPress Theme
Next step is to install a WordPress theme. Let’s go to Appearance > Themes.
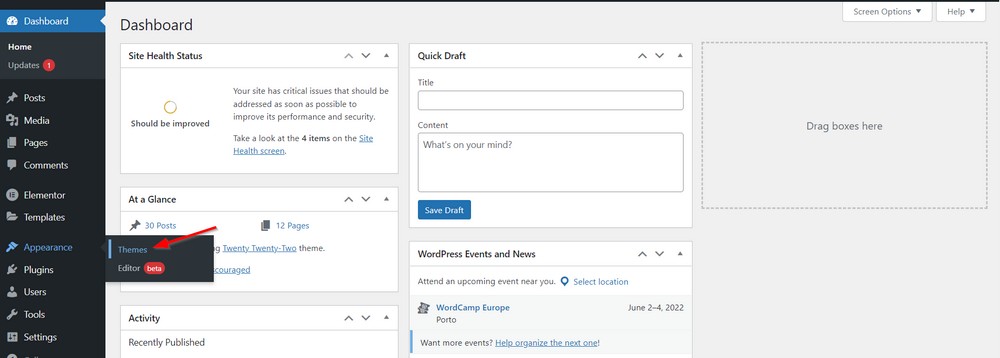
Click Add New.

Let’s go for the Popular Themes for this tutorial.
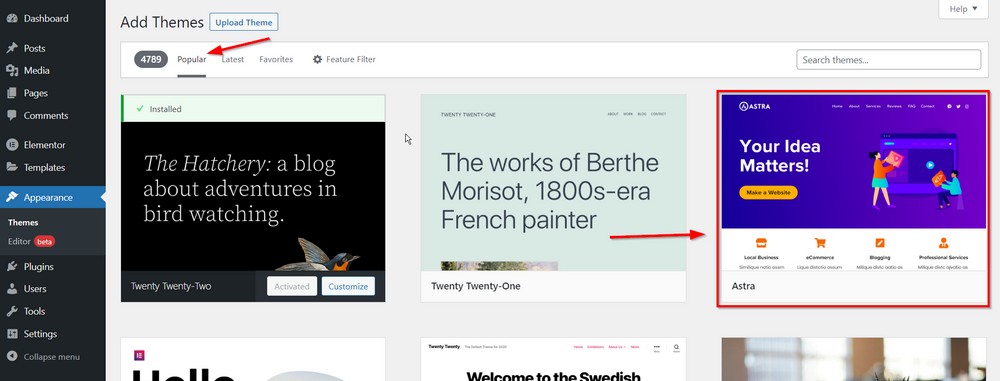
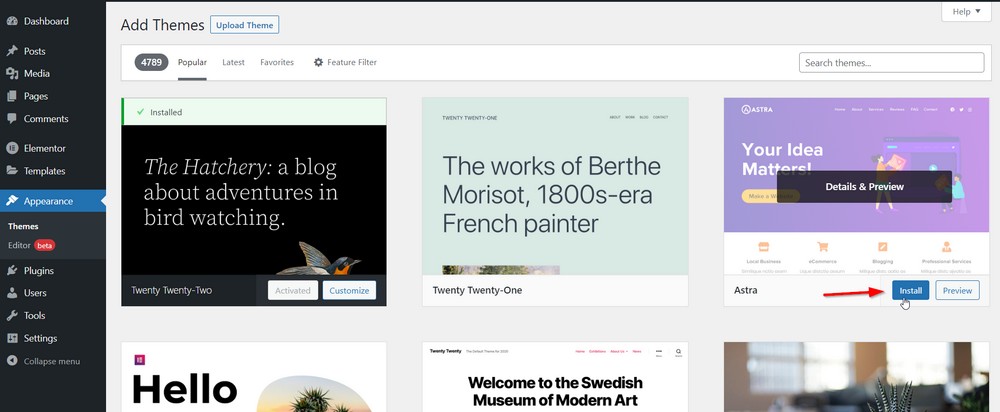
Next, hover your pointer over Astra and click Install and then Activate.
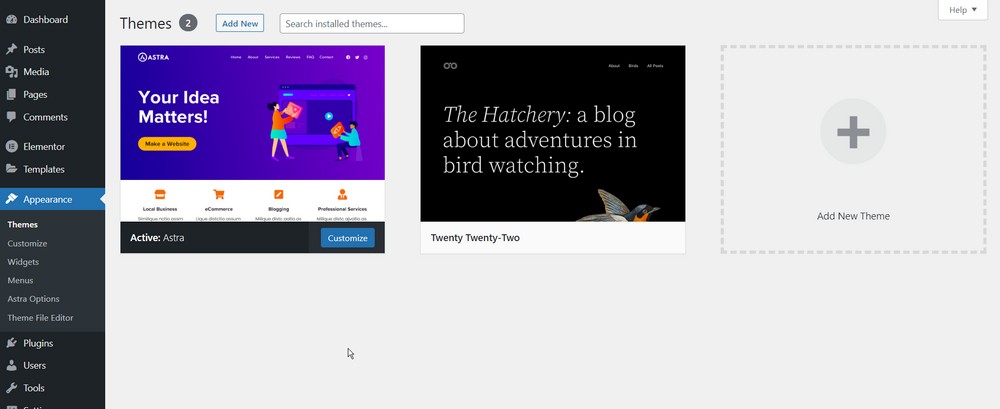
Once the theme is activated, you’ll see Astra Options under the Appearance menu.
Step 6 – Pick a Starter Site to Import
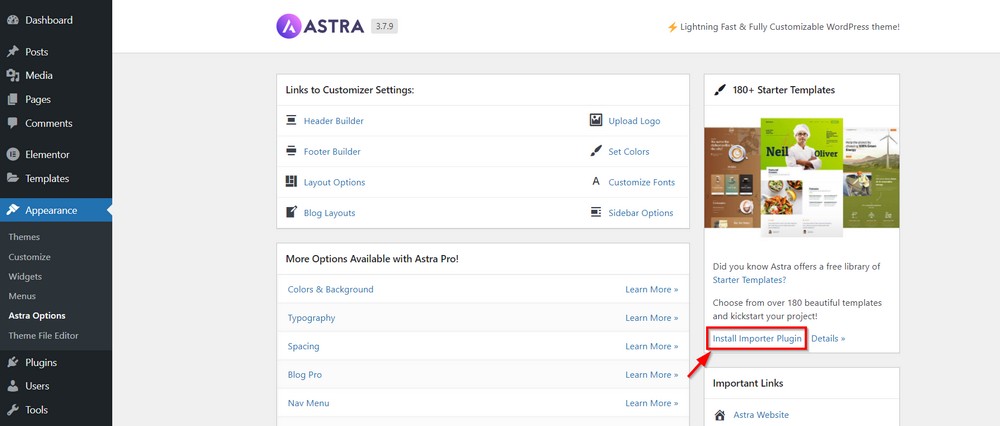
Let’s import a starter site. Go to the options for Astra theme by clicking on Appearance > Astra Options.
Go ahead and click on “Install Importer Plugin.” Once that’s done, click on “Download Library.”
Then you’ll go to a new page. Click on Elementor. It’s your page builder, which will let you choose from a variety of website designs.
For this tutorial, we picked Modern Design Solutions.
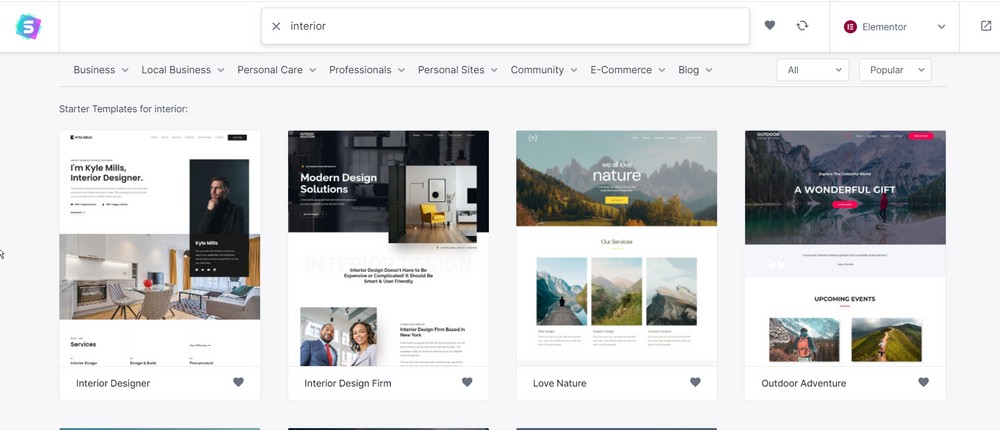
Click on the template that you want to import and then go through the setup.
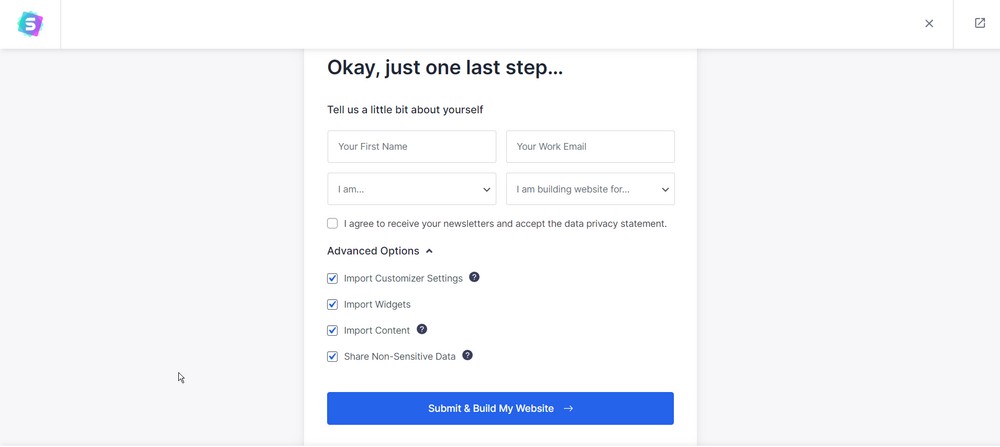
This setup will allow you to define your logo, brand colors, and fonts, and then take you to the installation.

Once done, the final step is to select all the elements that you want to import within this setup and then move ahead.
Let’s import everything.
You can go to the Astra website to get a full info of articles and tutorials on changing the look of your WordPress website.
Step 7 – Edit Your WordPress Web Pages With Elementor
Elementor is the name of the page-building tool that helps you create these beautiful designs.
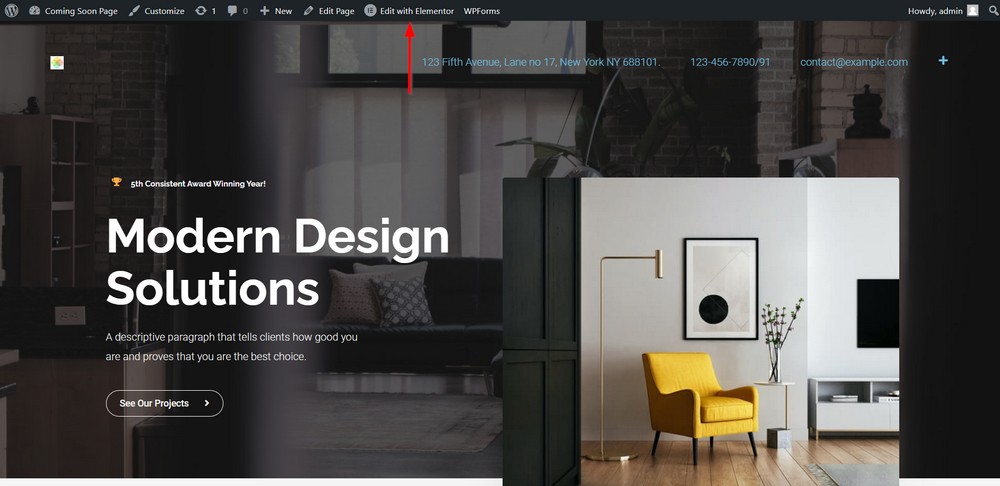
Here’s the full tutorial video on Elementor.
Step 8 – Set up the Contact Form
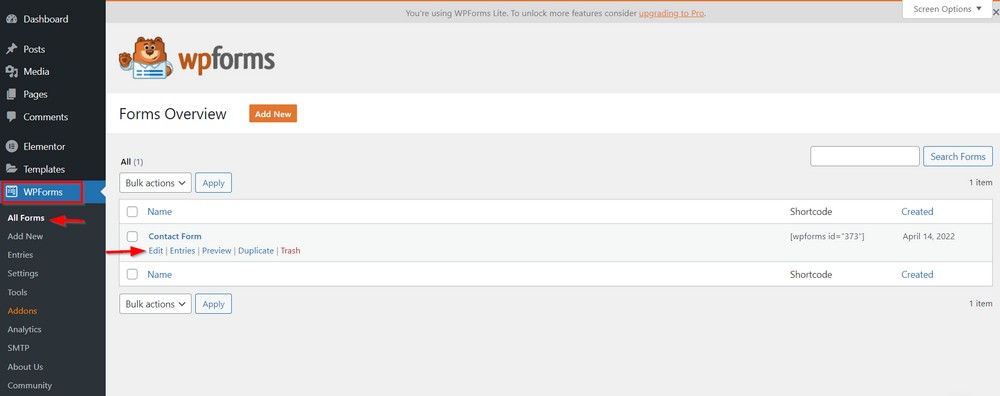
Let’s set your email address to where all the new WPForm entries will be sent to.
Go to WPForms > All Forms. Now, click Edit for the form where the entries should be sent.
Then, click Settings > Notifications.
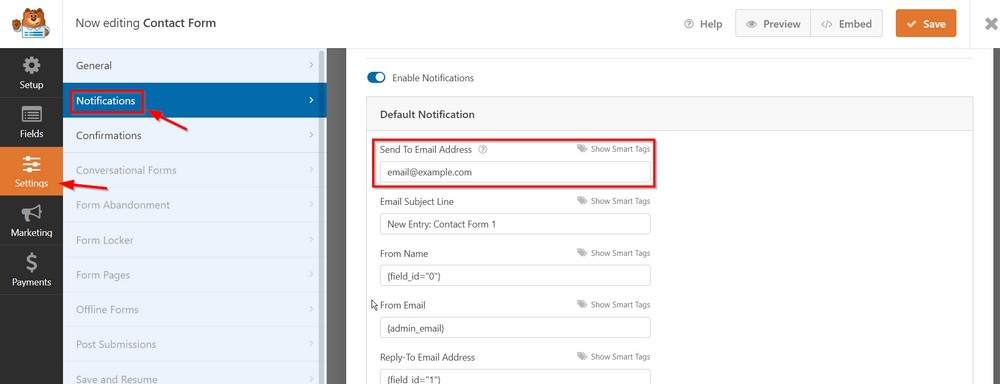
The Send To Email Address is where to put your email address. This page also lets you customize the format of the email, the subject lines and more.
So that’s pretty much it. A full WordPress website in just about 10 minutes.
Congratulations on making your new website!
Final Thoughts
Now that you know the basics of building a website, it’s time to get started with your own project.
Remember, you don’t need to be a coding expert to create a beautiful and functional website.
Just follow through the steps outlined here, and you’ll be good to go very soon!
If you need any help along the way, follow through the tutorials on my YouTube channel and check out other posts in this blog.
Finally, after your site is complete, be sure to promote it so that people can find it. With a little effort, you’ll have a website that you can be proud of in no time!
How quickly were you able to build your first website? What are some tricks that you learned along the way to create beautiful and functional websites quickly?
We’d love to hear your thoughts in the comments section!

Wow, this is awesome. Didn’t know it was this easy to make a full website. Thanks
I didn’t learn anything other than to install a plugin. And I’m guessing you ‘built’ this Website using that same plugin, because I’m now at the bottom of a very very long page, and no way to get to your top menu or home page. Not even a link in the footer.
WOW!
The video covered many things:
– How to setup WordPress hosting
– How to install an SSL certificate
– How to install a WordPress theme
– How to install a WordPress plugin
– How to customize your theme settings
– How to create a WordPress menu
– How to add your logo
– How to use Elementor
Wow, all in 10 minutes 🙂
thank you
Hi Adam,
I ran to you via a Youtube video. Your explanation was great and fixed the WordPress issue I had.
Your blog seems to have the same quality, so I am sure you will have me around here for some time as I run more than 10 sites with WordPress. God knows how many other problems I will run into.
P.s this how to post is top notch. I wish I’d have it on my hands when I just started out.
Regards,
Melos
Hi sir thanks for this content. I have a blog but performance is to much low. Please guide me for this
Use better hosting like Siteground or A2Hosting.
Thank you So much
This is proof that its not difficult to build a website for your business. Great Information!
Thanks Adam
This is just what I needed. A fast way to make a WordPress website.
Thanks Adam